Video to Flash Converter for Mac works effectively for converting both SD videos and HD videos to Flash FLV/SWF format.


Decompile, Convert and Create Flash SWF Files on Windows & Mac OS
Doremisoft Video to Flash Converter for Mac is the best Flash Video Encoder for Mac OS ever. After downloading the Mac Flash Video Encoder, follow this tutorial step by step to learn how to convert video video to Flash on Mac with the best quality. Doremisoft Video to Flash Converter for Mac can also automatically create Flash Video player (SWF) for the Flash Video and generate an HTML page to include the created SWF file, and you can customize the page properties conveniently.

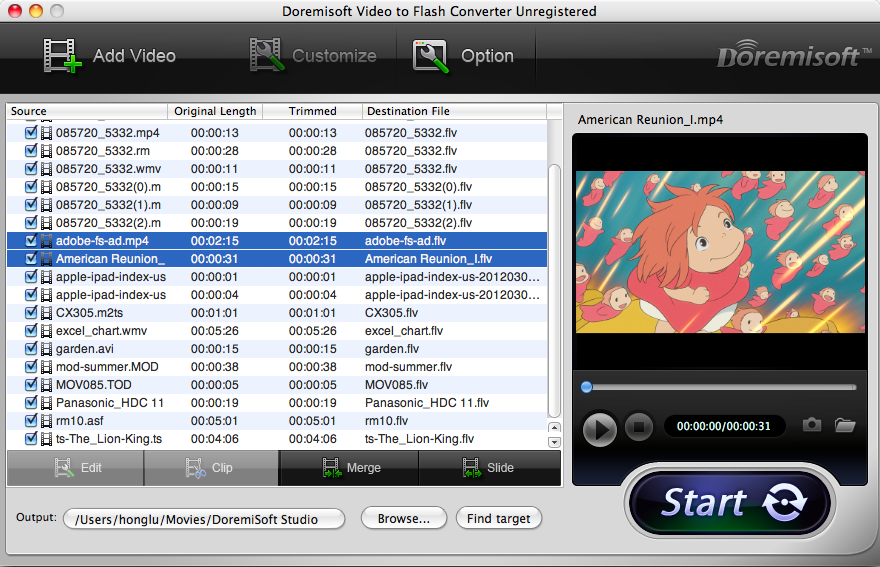
Click the "Add Video" icon to choose the videos you want to convert into it. You can import and convert multiple files at one time.
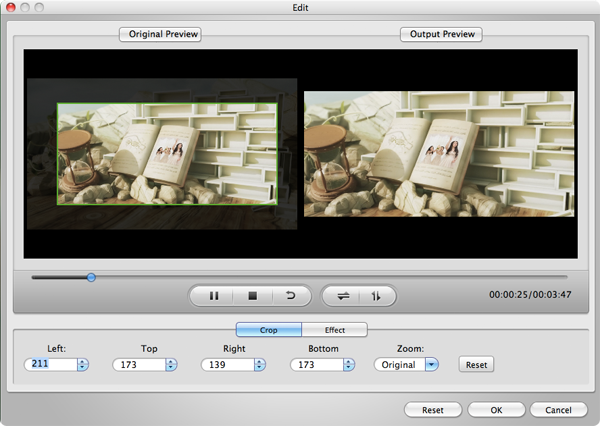
Hit the "Edit" button to open the "Edit" panel. Click the "Crop" tab, then you can crop the unwanted part like the black frame of the video by dragging the "green rectangle outline". You can fine adjust the detailed cropping area by giving the Left/Top/Right/Bottom value to define the position. In the "Zoom" drop-down list, you can apply the preset aspect ratio as original/full/16:9/4:3.
In the "Effect" panel, you can adjust the video's brightness, contrast, saturation, as well as adding special effect to the video image.
In the "Clip" pop-up panel, you can drag the triangle sliders separately to set the start and end time to trim the video. And you can get more than one segments from a single video.

You can choose two or above video files, and then click "Merge" to join them into a single one, or click "Slide" to take them into the same Flash player with a video playlist.
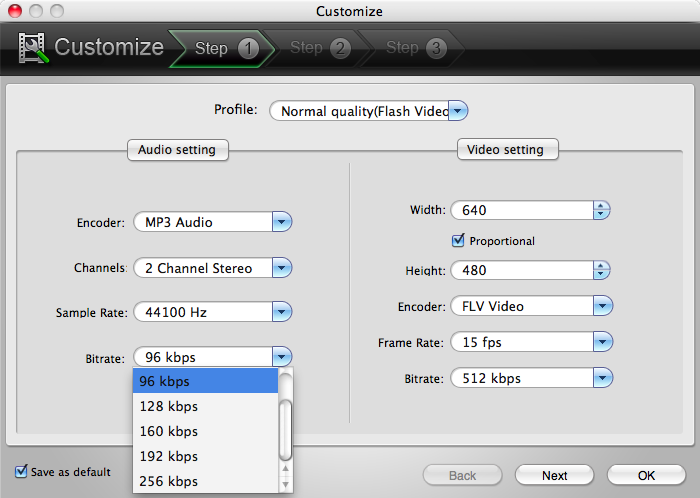
Hit the "Customize" button on the top of the main interface, then a pop-up "Customize" window will appear, which allows you to specify the output Flash settings such as setting the output video profile as High quality, Normal quality, or Low quality according to your own requirement. Thereafter, you can adjust the video/audio parameter settings such as audio Bit rate, Sample rate, video Bit rate, and Frame rate, which can make the output Flash Video suitable for different network band width.
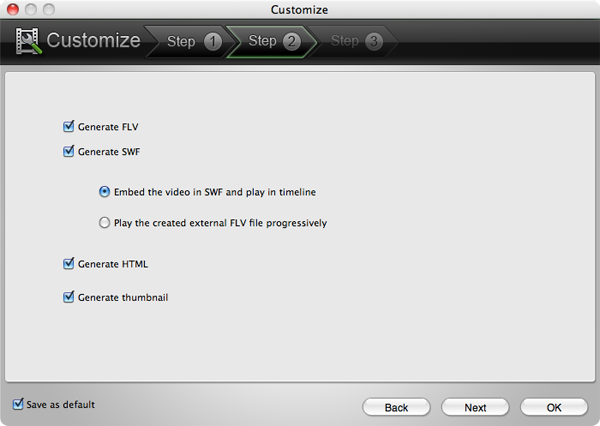
Click "Next", then you will see the options of "Generate FLV", "Generate SWF", "Generate HTML", and "Generate Thumbnail", etc.
"Generate FLV" - necessary. The FLV file is the main content of the Flash video.
"Generate SWF" - optional. This will create a Flash Video player (SWF) for playing the Flash Video. If you have chosen "Generate SWF", remember to choose "Embedded the video in SWF and play in timeline" or "Play the created external FLV file progressively" as well.
"Generate HTML" - optional. This will generate an HTML page to include the created SWF file. You can use the generated HTML code to embed the Flash video on any Webpage you want
"Generate Thumbnail" - optional. This will automatically create a thumbnail of the video for you.
Again, click "Next", then you will see a panel to let you further modify the output video. For example, you can pick up the player template you like:

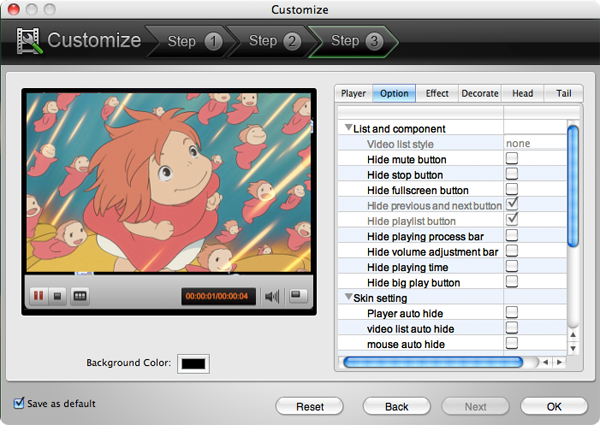
Hit the "Option" tab. Here, you can change the Flash's properties including list and component setting, skin setting, and playback setting. You have the control of the whole Flash video.
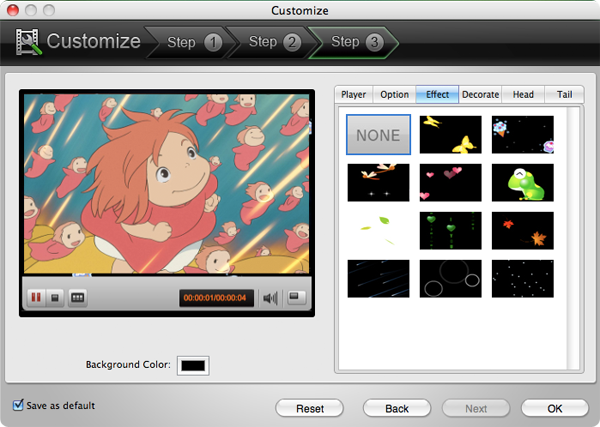
In the "Effect" panel, you can choose various special Flash elements to beautify the Flash video.
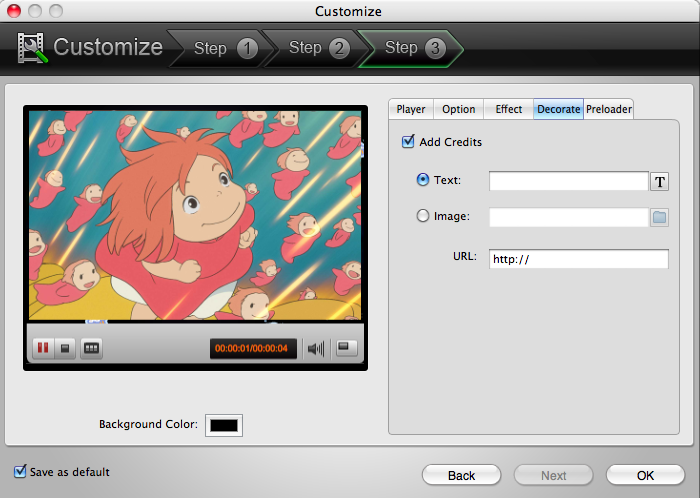
Click "Decorate", and then you have the option to add text or image watermark to the video. You can also embed clickable URL in the Flash video for engagement with viewers.
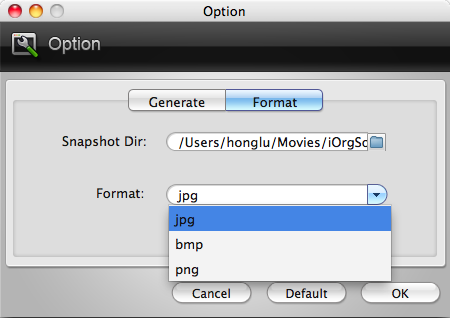
Press the big "Option" button on the top tool bar of the main interface of the program, then a pop-up window will appear. You can specify the save path of the snapshot pictures and the snapshot picture format. Besides, you can tick the "Auto update" check box here.
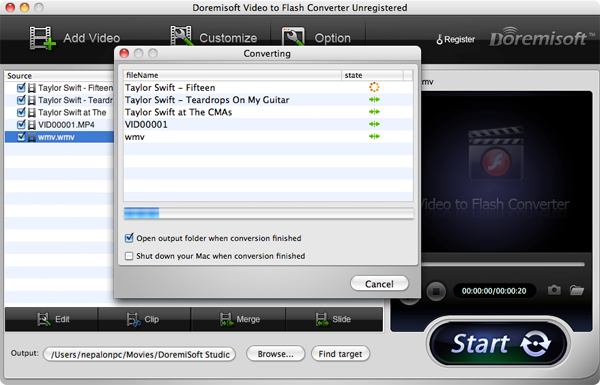
After all the settings, specify an output path to save the output Flash video. Afterward, press the "Start" button to launch the conversion. During the conversion process, the program will show the finished percentage of the conversion. You can optionally choose to open the output folder, or shut down the computer when the conversion finished.
When the conversion is done successfully, you can embed the Flash video to any Webpage you want. Here is an example of how to display flash video on your webpage:
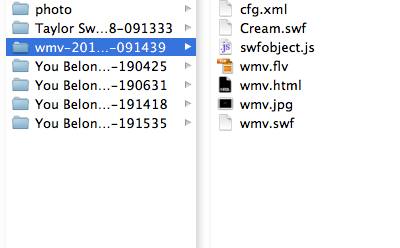
1. Upload the whole output folder you save the Flash video to your web server host and make sure that the folder contains all the generated Java Script file, SWF and FLV files.
2. Right-click the generated HTML file (in the output folder), and then Select "Open With". Choose either Notepad or another editor to open the file.
3. Copy the source code from the HTML file, and paste it into your webpage on which you want your flash video to display.

$49.95
Video to Flash Converter for Mac works effectively for converting both SD videos and HD videos to Flash FLV/SWF format.

$49.95
Video to Flash Converter is your ideal choice to convert all kinds of videos to Flash FLV and SWF format.